 |
 |
 |
These pictures show a reverse switch retro-fitted to a SM420 transmission top plate. Unfortunately, I didn't take the time to photograph the modifications that I made to the internals of the top plate so I've attempted to illustrate here what I did using pictures of an unmodified top plate.
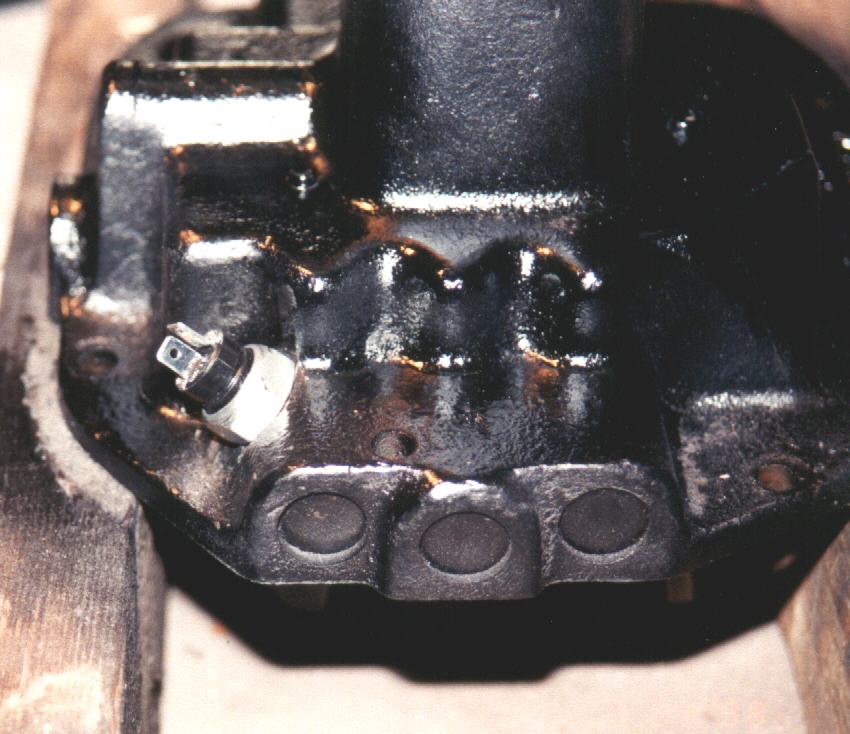
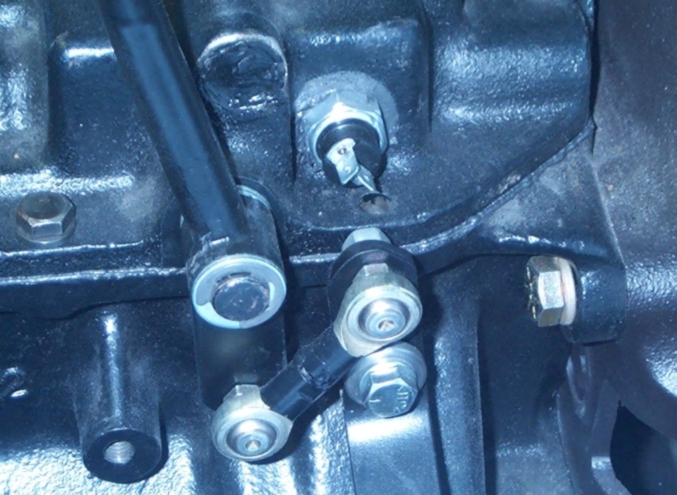
The switch that I used is a NAPA p/n NS6578 shown in the first picture below with the top plate mounted on the transmission. This is a view from the passenger side. Note that the location chosen blocks the use of one of the bolts that hold down the top plate. This transmission is so beefy that I don't think that this will cause a problem. An alternative is to mount the switch into the top plate so that the reverse rod (seen in the second and third pictures) actuates the switch. An example of that may be found here. If I remember correctly, this picture was sent to me by June Bennett, the author of the web page referred to above. It shows a front view of the top plate with the switch installed.
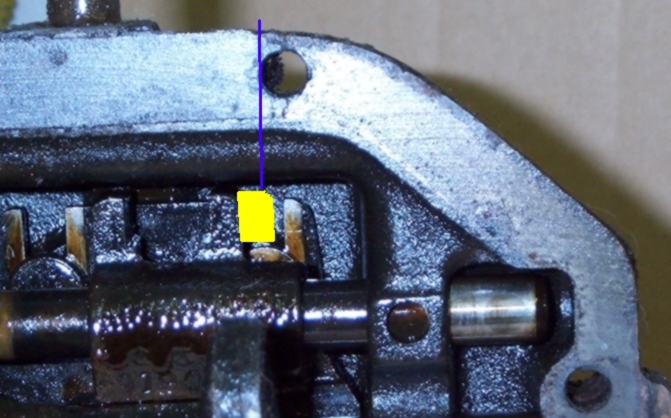
The second picture shows the shifting mechanism in the "reverse" position. The yellow block represents a piece of 3/8 square rod about 3/4" long with one corner ground to a rough radius. The switch has a ball end plunger so the radiused corner on the block slides smoothly over and depresses the actuator. The block is welded to the forward part of the fork that actuates the reverse lever in the transmission. The blue line represents the approximate centerline of the hole drilled through the casting through which the reverse switch is mounted. This hole is drilled to the size appropriate for the threaded end of the switch. Note the cylindrical rod the the lower right quadrant of the picture. It is this rod that actuates the switch in the alternate method referred to above.
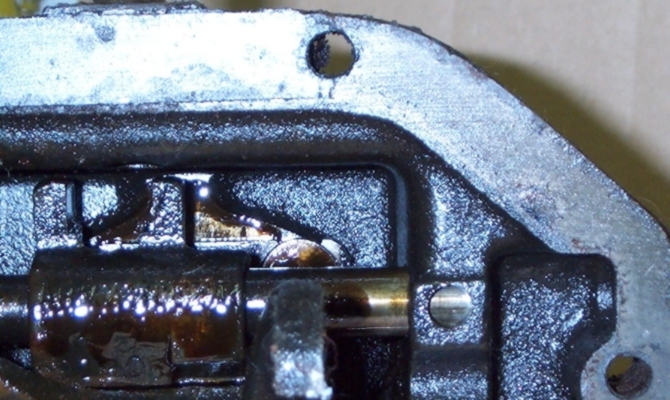
The third picture shows the shifting mechanism in neutral so you can see that there is plenty of motion allowing the actuating block to move away from the switch.
|
|
|
|